With this guide, let me take you through the steps to enable USB debugging on your Android device. It is required if you aim to modify your Android gadget in any way. Some modifications require you to connect your Android phone with the PC.
Now you may ask we can simply connect our phone as it is to the computer. Why need to enable the USB debugging.? Well, connecting the smartphone for mere data transfer and connecting the Android device to a PC for modifications are two entirely different things.
When you wish to do modifications on your Android device you have to use certain commands known as ADB commands that require you to install ADB on the computer. Through the PowerShell on PC, you enter these commands which are executed aimed at the smartphone connected to the computer. One example can be bootloader unlocking or flashing an OTA update manually on the smartphone.
By default, USB debugging is kept disabled by the OEM. There are two phases to enable USB debugging. First, you have to enable Developer options on your smartphone. That will activate an option called USB debugging which you will locate under Developer Options. As you may guess, all these options will be available in the Android device settings app irrespective of what Android smartphone may use.
Things You Can Do After You Enable USB Debugging on any Android Device
To make any modifications, you need to enable USB debugging on your Android device. At the same time, the computer you are trying to use must also run the ADB tools. With USB debugging enabled, you can
- Unlock bootloader of the Android smartphone
- Reboot the smartphone to any custom recovery or stock recovery
- Perform patching of stock boot image of any smartphone
- App debugging
Without USB debugging enabled, ADB commands cannot execute even if you simply connect the PC and the Android device through a USB cable.
USB debugging is supported on Android OS version 4 Kitkat and all the later Android OS builds till Android 11.
How to Enable Developer Options
This is the first step to enable USB debugging on your Android device. Now, carefully follow the steps.
- Grab your Android device
- Open the Settings app
- Naviagte to the About Device or About Phone section


- Go to the Build Number
- On the build number, tap around seven times [on some devices it may ask you device password. Just enter it]
- You will see a pop-up that says “You’re Now A Developer”
- Now, under the System tab inside Settings a new option will show up called Developer Options
- In the screenshot below from my Android device you can see when I tap on Build number it says “No need, You’re already an Developer”. It says so because I have already enabled Developer options on my Android phone.
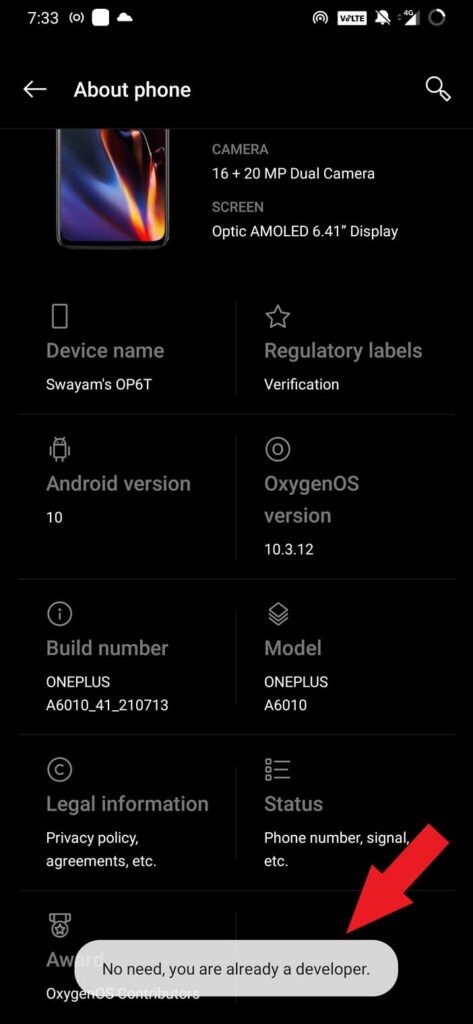
NOTE: Keep in mind that in some Android devices, the Build number may be present in a different location but rest assured that you will find it within the Settings app only mostly in the About Device section.
Also read: How to Install Magisk on Any Android Devices and Root It [2 Methods]
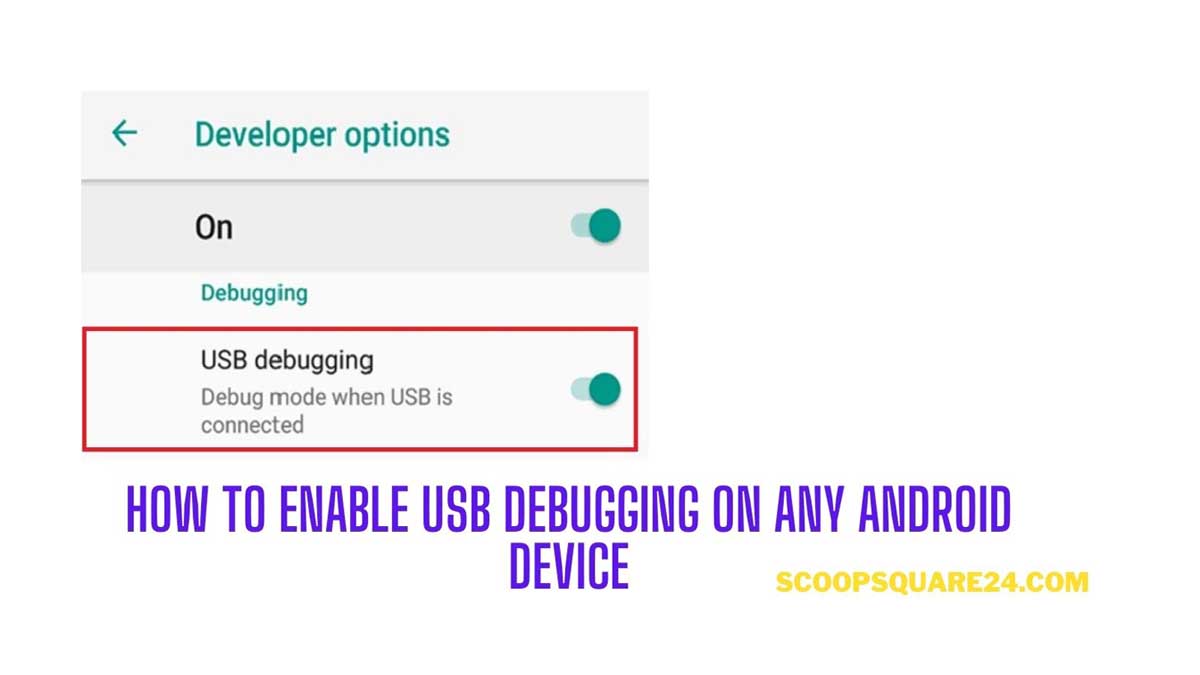
Steps to Enable USB Debugging
Now, under Developer Options, you need to find your way to the option USB Debugging which you have to enable.
- Open the Settings app
- Go to the System tab and tap on it.
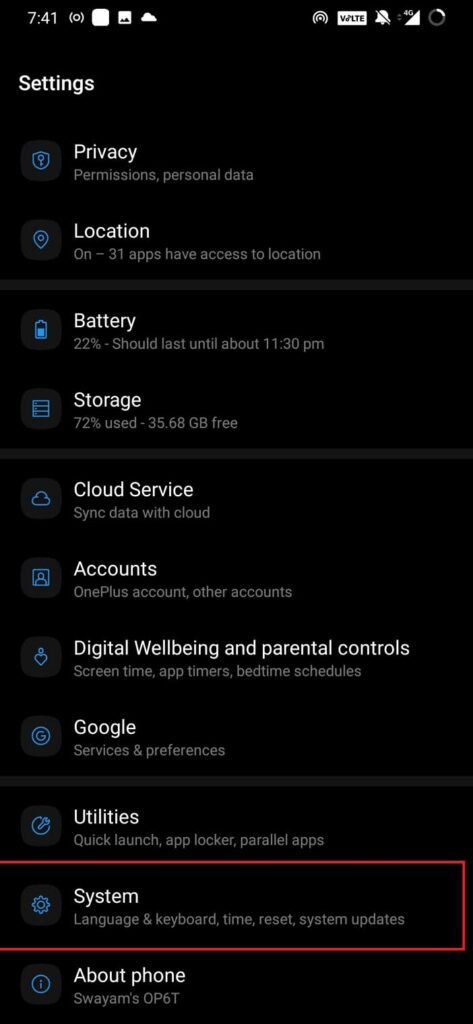
- Inside that naviagte to to the newly created Developer Options.

- Once inside Developer Options make your way to the option USB debugging
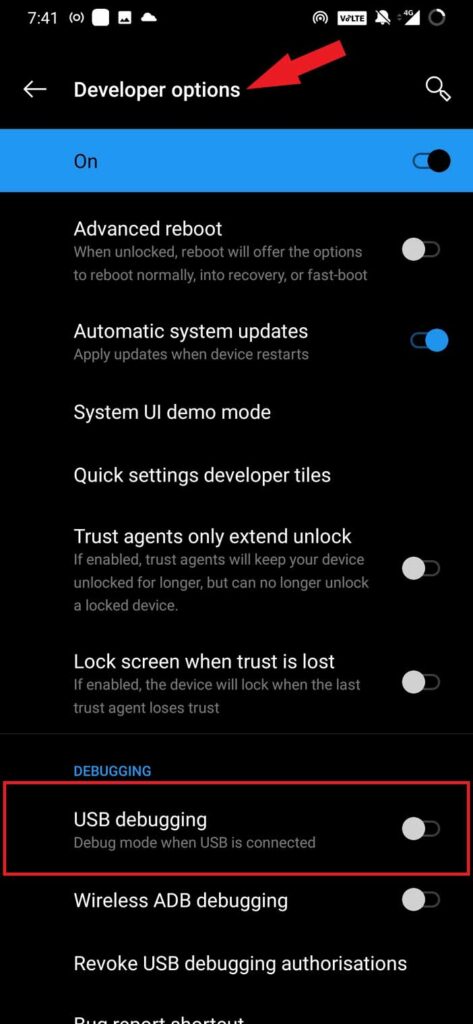
- Tap on the switch beside USB debugging to enable it
- A pop-up will show up asking you to confirm the action and mentions briefly why USB debugging is usually done which is for development and debugging purposes.
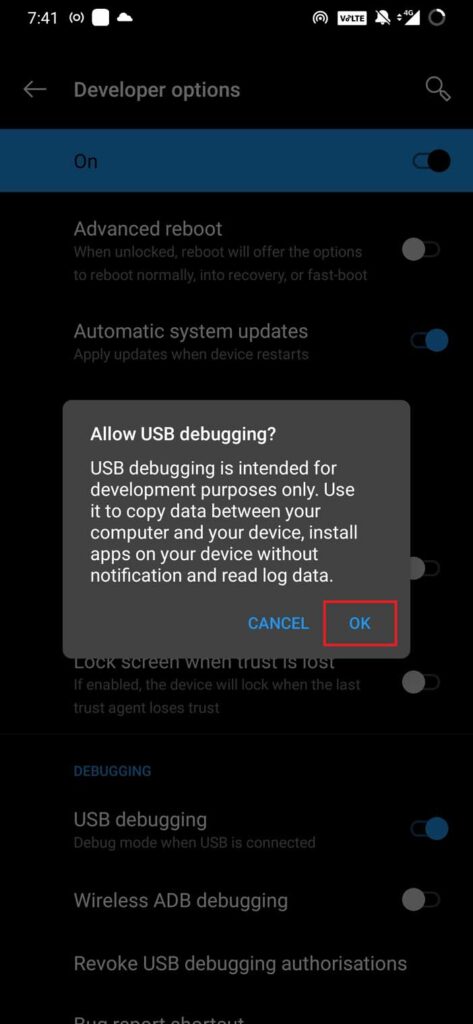
- Tap on OK to confirm.
Now, you have successfully enabled the USB debugging on your Android device. Not only smartphones you can also enable USB debugging if you have an Android tablet. Steps remain the same regardless of the device or OEM.
You can hereafter connect your Android smartphone with the PC and perform the various actions that I have listed earlier in the guide. Just make sure to install the latest ADB tools on your PC.
If you are keen on modifying your Android device, then you must enable USB debugging on your Android smartphone. I hope this guide will help you out.
Also Read: How to Root Android Phones – Simple Step-By-Step Guide